Google App Engine (GAE) is a Platform as a service(PAAS) cloud computing platform for developing and hosting web applications in Google-managed data centers. You can code in 3 languages, Python, Java and Go. Google App Engine is free up to a certain level of consumed resources.[1]
Step 1: Logging into Google App Engine
Step 3: Create Application Identifier
Step 4: Install required software
Step 5: Start Google App engine console
Step 6: Create a new Application from console
I used Google App Engine SDK for Python to write notes app. If you don’t want to host and just want to play with GAE you can do so by downloading it.
URL of my notes app: http://notes2027.appspot.com
What it is all about? Check the previous post: https://unreachable2027.wordpress.com/2012/11/21/local-search-engine/
On each Google Account you can create 10 applications. For more information and documentation on Google App Engine check at https://developers.google.com/appengine
This post mainly focuses on starting with Google App Engine, and deploying the notes app code. I m using Windows7 Operating System. For other operating systems also the steps are same with little changes during installation process.
Step 1: Log into your google account. https://appengine.google.com. After logging in,it displays as follows.

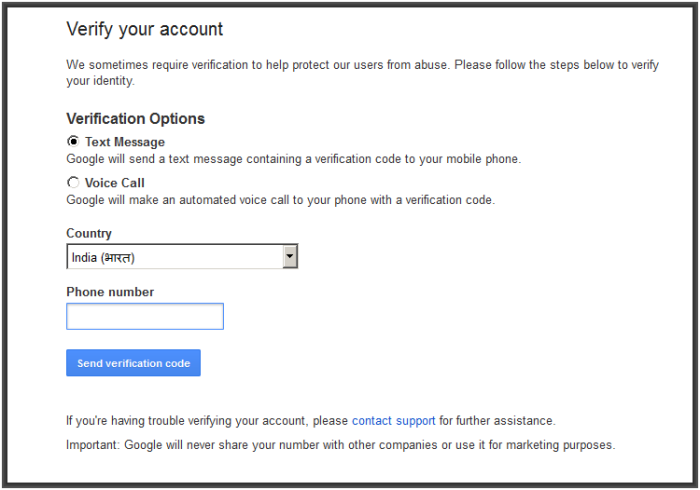
Step 2 : Click on create Application. You have to verify your account.
Step 3: After verifying your account, you have to create an application identifier which is the <part of the url to identify your app>.appspot.com. You have to give a different one as application identifier. Accept the terms and Conditions and click on create application.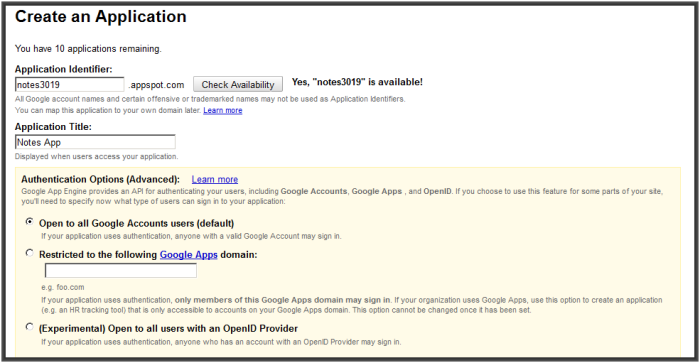
After successful creation it displays as below.
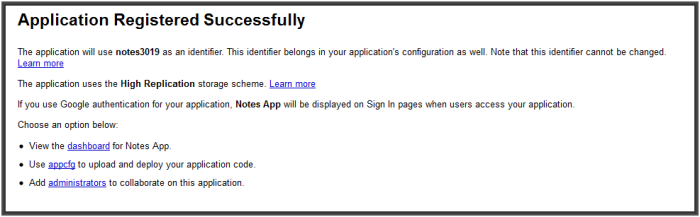
If you visit the URL at this stage: notes3019.appspot.com,(change notes3019 with your application identifier) it shows an error as below. This is because you didn’t upload anything yet. We will do it shortly.

Step 4 Inorder to upload the code, we need Google App Engine Python SDK.
Download and install GAE Python SDK.
Download and install Python 2.7
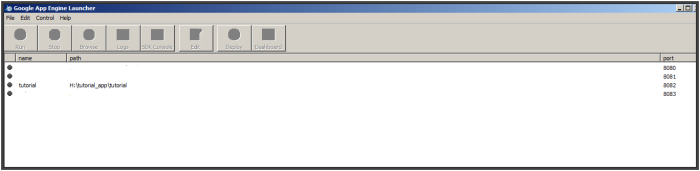
Step 5 Start Google App Engine Launcher. It displays as below. By default it has a tutorial app. To start it, select and click on start. And to access it, use localhost:8082 (your port may be different, displayed in the launcher) in your browser. Which displays Hello World.
I don’t remember exactly if there is any test app. If it is then when you start GAE launcher it looks as follows.
Step 6Create a new application. File -> Create a new Application. Give an application name as your application identifier, in my case it is notes3019 and give path and port number of your choice.

Step 7 If you check in the path a folder is created with application name, in my case it creates notes3019. It has following files by default. What each of these files signifies can be found in the documentation.
For understanding puposes: files with yaml extensions are config files and files with py extrensions are python files- code files.

Now if you start the app and go to localhost:8084 (port number may change in your case), it displays hello world as follows.

Step 8 Download the zip file from http://webers.co.in/notes3019.zip and extract to the path, in my case it is h:/notes3019. Replace files. This is my domain, so you don’t have to worry about any malicious content. Open app.yaml and change the application value to your application identifier name(notes3019). To test check localhost:8084 it will display something as below. To change password you have to change at line 195 in main.py, by default password is test.
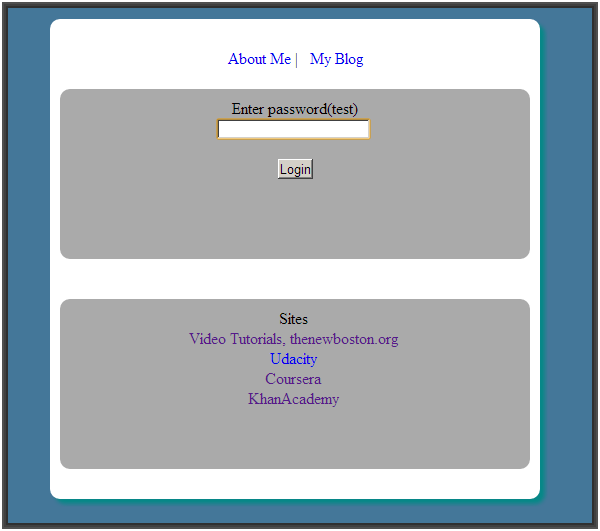
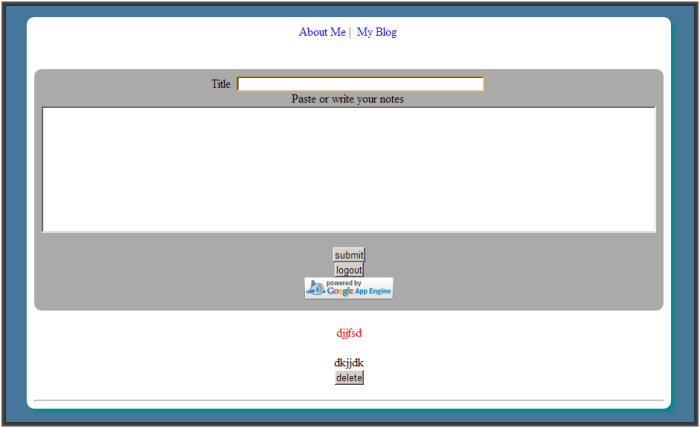
After issuing the password, it displays as below.
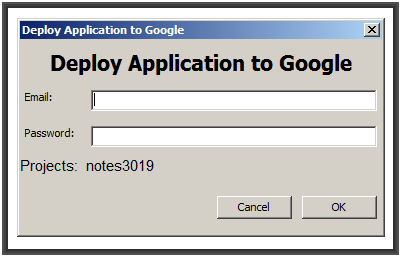
Step 9 Now, we have to deploy this. Click on Deploy in GAE launcher. It asks for Email with which application is created and Password. GIve the details and click ok. It will open a new window and shows whats happening. Once it is deployed it says “you can close this window now”.
Step 10 Now you can check your URL. notes3019.appspot.com. To check the same use http://notes2027.appspot.com
References:
[1] – http://en.wikipedia.org/wiki/Google_App_Engine
https://developers.google.com/appengine/docs/python/gettingstartedpython27/

[…] https://unreachable2027.wordpress.com/2012/12/29/deploying-notes-app-on-google-app-engine/ […]